What Is Tapestry Connect - Enterprise Edition?
Tapestry Connect - Enterprise Edition gives IT teams and administrators fine grained control over the permissions and scope of what Tapestry Connect has access to within their Azure tenant.
What is the Difference from the non Enterprise Edition?
The non Enterprise Edition of Tapestry Connect connects on a user-by-user basis, using Delegated Permissions scoping what is available to the currently signed-in user. An IT administrator is currently required to approve the consent request upon the first time a Cascade user attempts to set up Tapestry Connect.
The Enterprise Edition makes use of a dedicated Enterprise Application configured and maintained by your IT team, using Application Permissions. This allows for complete control over who is included in the access scope (through the use of User Groups), control of scopes (as long as the base required scopes are included), and the ability to monitor activity such as who is connecting and full audit and log history.
How Do We Set Up Tapestry Connect - Enterprise Edition?
Tapestry Connect - Enterprise Edition makes use of an Enterprise Application within your Azure Tenant and uses a set of client credentials to allow Cascade and Tapestry to access user files, these are the steps to get started:
- Setup the Azure Enterprise Application
- Add the application credentials to Cascade
- Grant the Azure Entra Policies
1. Setting up Azure Enterprise Application
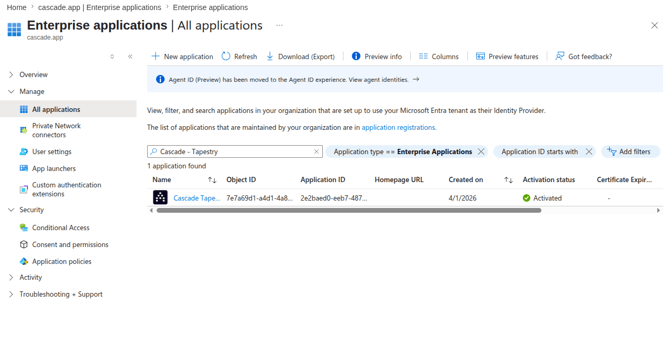
1. Have your Azure Tenant Administrator set up a new Enterprise Application called Cascade - Tapestry Connect
a. In your Azure Tenant Portal navigate to Microsoft Entra ID
b. Choose Enterprise Application from the Manage menu
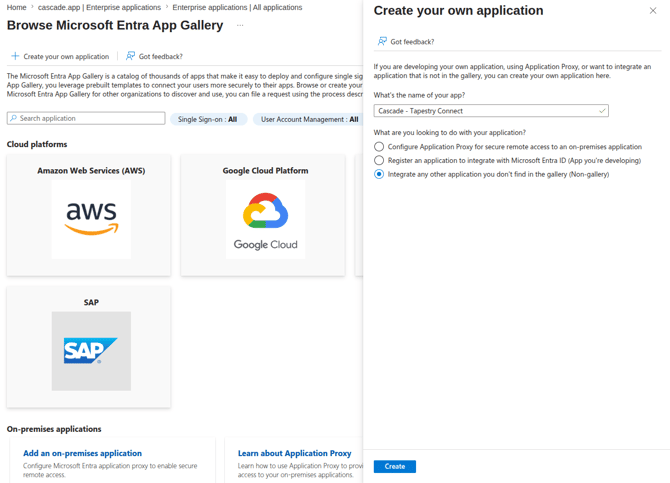
c. Create a New Application and choose Create your own application
d. Choose to Integrate any other application you don’t find in the gallery (Non-gallery)
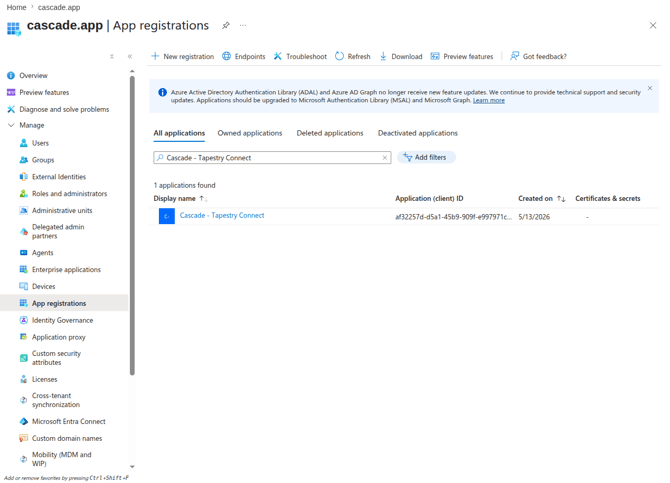
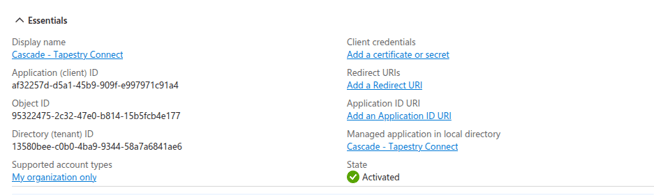
2. After the application is created, locate it in your App registrations
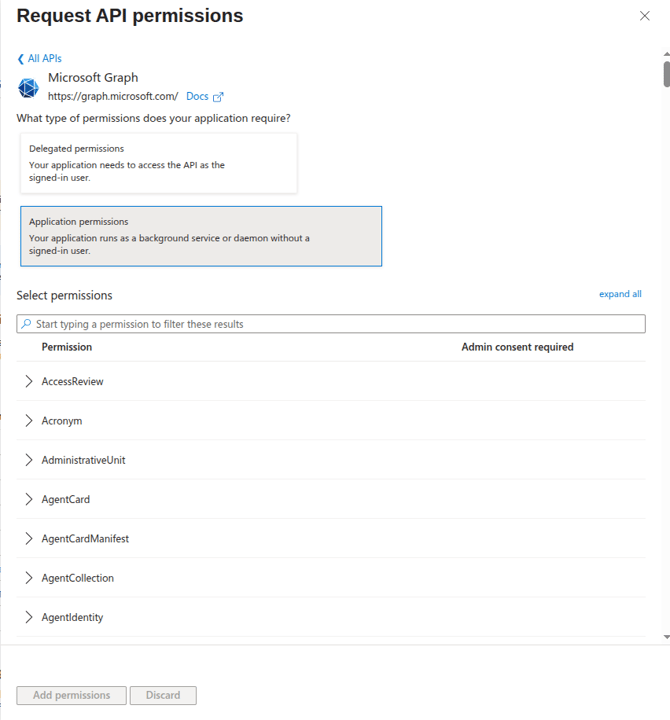
3. Navigate to API permissions and add the following Microsoft Graph API Permissions using Application Permissions
-
- OnlineMeetings.Read.All - Allows access to the authenticated users online meetings
- OnlineMeetingTranscripts.Read.All - Allows reading ALL types of the users meeting transcripts (note: Teams has multiple types of meetings depending on how the meeting was started/scheduled).
- Chat.ReadBasic.All - Allows read access to the users chat meatadata (not message content), to assist in finding call transcripts. Teams stores some call transcripts in chat threads, we use these threads to also determine meeting participants.
- CallTranscripts.Read.All - Allows access to the authenticated users call transcripts.
- User.Read - Allows fetching user metadata. Tapestry Connect requires this for matching email addresses between Teams and Cascade to replicate meeting transcript permissions.
4. Navigate to Certificates & Secrets and add a new Client Secret
a. Add Tapestry Connect Enterprise as the description
b. Set your expiry based as needed, noting that you’ll need to reauthenticate in Cascade any time this secret is rotated
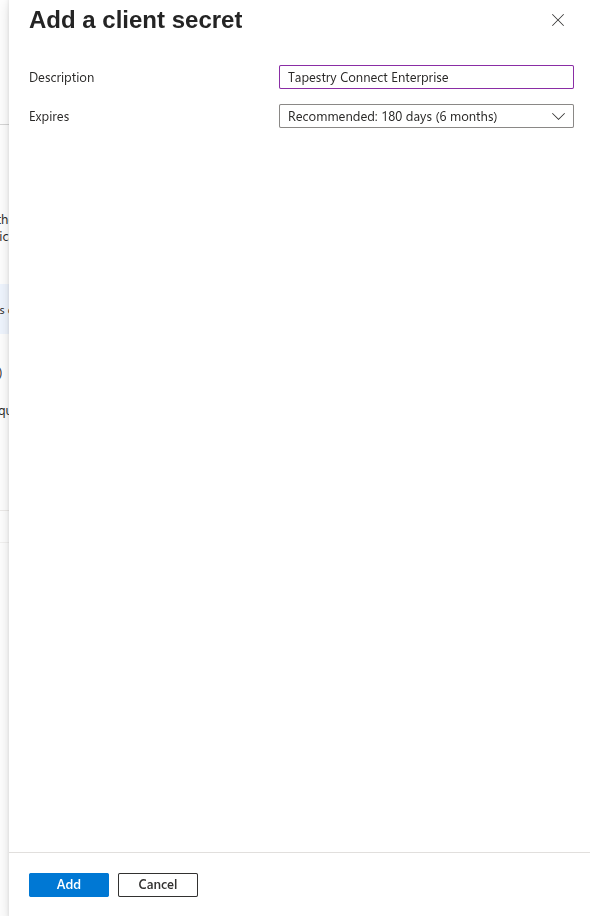
c. Make sure you store the Secret Value (not the Secret ID) securely as once you leave this page you won’t be able to get it again.
d. This value is used alongside the Application (client) ID that you can get from the Overview page as the client credentials for setting Tapestry from the Cascade UI
5. A user group can be created specifically or you can use an existing group (for example from your SSO configuration) to attach to the Enterprise Application
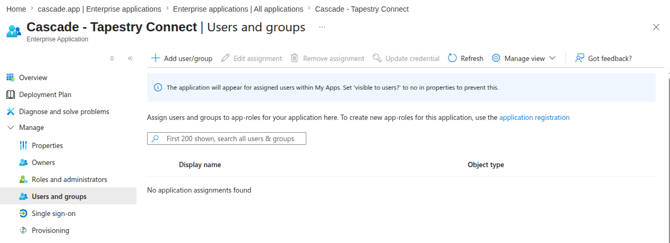
- Choose Add user/group
- Choose the Active Directory group and that concludes the Azure Tenant setup for Tapestry Connect Enterprise+
2. Setting up the connection inside Cascade
Inside Cascade navigate to your initials > My Profile > Connected Accounts > Microsoft Teams (Enterprise) and click connect account.

This will open a window giving an overview of the connector, click 'Connect'

You will then be required to and your Client ID, Client Secret and Tenant ID which you created in your Azure Tenant. Once these are adding click continue.

3. Setup Azure Entra Policies
This is a script that can be run by your Azure administrator to provision an access policy against that group and tightly scope what your Enterprise Application credentials allow Tapestry to access via the Graph API. The combo of the above permissions and this policy create the tightest possible scope to minimise the surface area accessible to the graph connector.
This allows the credentials configured in the previous step to access Teams meetings via the Microsoft Graph API (only for the group of users you specify).Without this step, no recorded transcripts will be accessible via Tapestry Connect.
This policy creation script can be run directly from the Azure console, via the PowerShell terminal or however the Azure admin would normally run similar scripts.
# ================================================================================
# UPDATE THESE VARIABLES BEFORE RUNNING
# ================================================================================
$AppId      = "YOUR_APPLICATION_CLIENT_ID"   # The Application (Client) ID of the Enterprise App
$TargetUser = "user@yourdomain.com"          # The UPN / Email of the targeted user
$PolicyName = "CascadeTapestry-SingleUserRestriction"
# ================================================================================

# Step 1: Ensure the Microsoft Teams Module is Installed
if (-not (Get-Module -ListAvailable -Name MicrosoftTeams)) {
    Write-Host "Installing Microsoft Teams PowerShell module..." -ForegroundColor Yellow
    Install-Module -Name MicrosoftTeams -Force -AllowClobber -Scope CurrentUser
}

# Step 2: Connect to the Teams Tenant Environment
Write-Host "Connecting to Microsoft Teams..." -ForegroundColor Cyan
Connect-MicrosoftTeams

# Step 3: Create the Application Access Policy
Write-Host "Creating Application Access Policy: $PolicyName..." -ForegroundColor Cyan
try {
    New-CsApplicationAccessPolicy -Identity $PolicyName -AppIds $AppId -Description "Restricts the application access strictly to authorized users."
    Write-Host "Policy created successfully." -ForegroundColor Green
} catch {
    Write-Host "Policy configuration check skipped or policy already exists." -ForegroundColor Gray
}

# Step 4: Assign the Policy exclusively to the Target User
Write-Host "Assigning policy to $TargetUser..." -ForegroundColor Cyan
Grant-CsApplicationAccessPolicy -PolicyName $PolicyName -Identity $TargetUser
Write-Host "Policy successfully assigned to user container." -ForegroundColor Green

# Step 5: Run Post-Configuration Verification Checks
Write-Host "`n==============================================" -ForegroundColor Yellow
Write-Host "       VERIFYING POLICY CONFIGURATION        " -ForegroundColor Yellow
Write-Host "==============================================" -ForegroundColor Yellow

Write-Host "`n1. Verification: Policy Mapping" -ForegroundColor Cyan
Get-CsApplicationAccessPolicy -Identity $PolicyName | Select-Object Identity, AppIds, Description | Format-List

Write-Host "2. Verification: Active User Scope Assignment" -ForegroundColor Cyan
Get-CsOnlineUser -Identity $TargetUser | Select-Object Identity, ApplicationAccessPolicy | Format-List

Write-Host "[IMPORTANT NOTE] Microsoft Graph uses a distributed synchronization cache." -ForegroundColor Yellow
Write-Host "Please allow 30 to 60 minutes for Microsoft's cloud infrastructure to fully map this access restriction." -ForegroundColor Yellow
Write-Host "Your enterprise application will throw an authorization error until sync completes.`n" -ForegroundColor Yellow